Schedule
Create weekly schedule entries and check room occupancy.
The Schedule consists of recurring weekly entries. Each entry specifies which group occupies a selected room, on which weekday and at what time.
An entry is not a one-off event on a particular date. It recurs each week as part of the Continuous schedule or a selected schedule period.
Continuous schedule and periods
The Continuous schedule is the standard weekly plan and is sufficient for normal operation. You do not need to create a period before publishing activities.
Periods are optional. They can temporarily replace the standard plan or add entries to it, for example during holidays or a special event. When configuring MARTA for the first time, prepare the Continuous schedule first and use periods only when they are genuinely required.
How do I open the Schedule?
- Go to Components → MARTA.
- Select Schedule from the MARTA Dashboard.
The default Currently displayed schedule filter shows the set that currently applies on the website: either the Continuous schedule or the relevant replacing period together with any supplementary periods.
To edit the standard plan, select Schedule / period → Continuous schedule. You can also select a particular period or display entries from every period.
Table and week views
The switcher above the list provides two views:
- Table — shows the weekday, period, time, group, room, note, state and identifier. This view is best for filtering, changing the state of several entries and deleting entries.
- Week — places activities on a timeline from Monday to Sunday. The card colour comes from the group settings, and selecting a card opens the entry for editing.
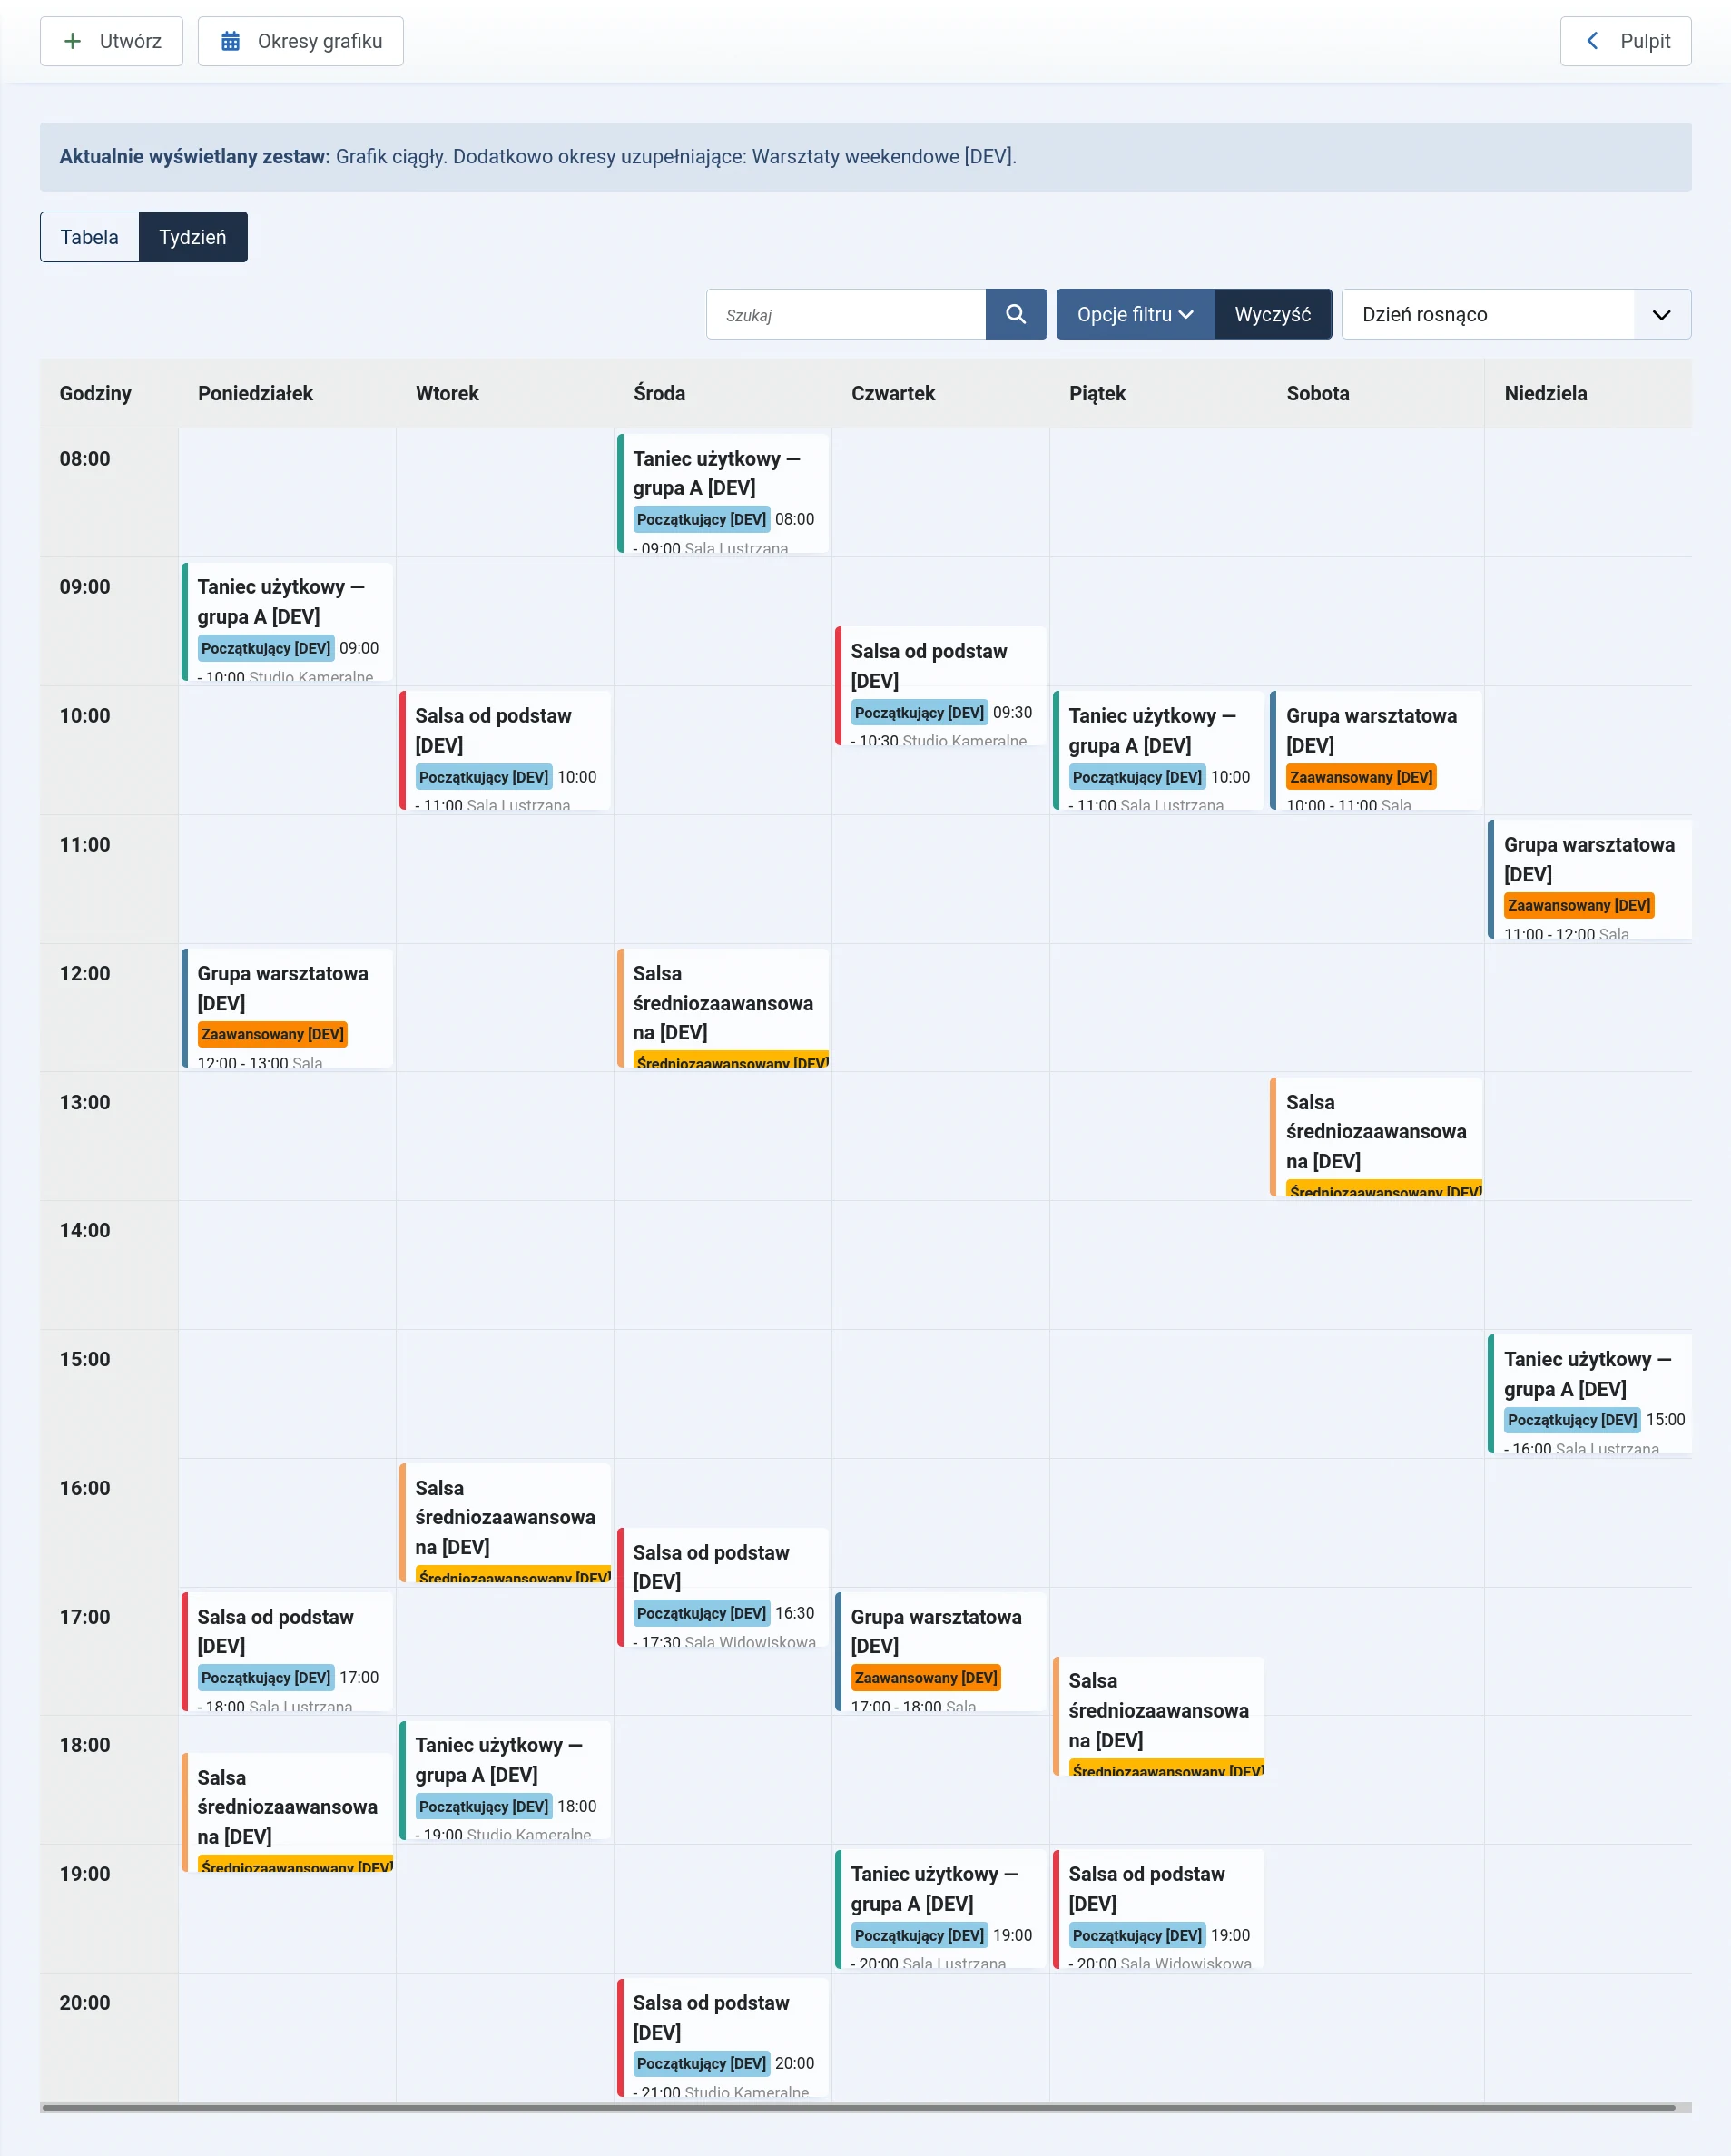
Search checks the group, level, room and building names and the note. You can also filter by weekday, schedule or period, room, group and state.
Creating a schedule entry
Before you begin, publish at least one group and room. Only active items are available in a new entry form.
- Select New from the Schedule list.
- Leave Continuous schedule selected in Schedule / period, or choose a prepared period.
- Select the group and room.
- Select the weekday.
- Enter the start and end times.
- Add a short organisational note if required.
- Select the appropriate state.
- Select Save & Close or Save.
Form fields
- Schedule / period — determines whether the entry belongs to the Continuous schedule or a particular period.
- Group — required; the published group or class occupying the room.
- Room — required; the published room in which the activity takes place.
- Weekday — required; a day from Monday to Sunday.
- From and To — the required time range; the start must be earlier than the end.
- Note — optional supporting information for the entry.
- Entry state — determines whether the entry can appear in the currently applicable schedule.
Room occupancy conflicts
MARTA checks whether another published entry can be displayed in the same room, on the same weekday and at an overlapping time. The analysis covers the Continuous schedule and periods that may apply at the same time.
If a conflict is found, the system lists the affected entries and asks for explicit confirmation. Confirming allows the entry to be saved or published, but does not resolve the conflict.
Back-to-back activities, such as one ending at 10:00 and another starting at 10:00, do not overlap. MARTA checks room occupancy but does not assess the time needed to change groups or prepare the room.
Entry states
- Published — the entry can be visible when it belongs to the currently applicable schedule or period.
- Unpublished — the entry remains stored but is temporarily disabled.
- Archived — the entry is retained outside the current list.
- Binned — the entry is waiting to be restored or permanently deleted.
Publishing an entry that belongs to a period is not sufficient on its own. The period must also be published and currently applicable.
Deleting an entry
The entry must first be moved to the bin. In the Table view, select the Binned state filter, select the entry and use permanent deletion.
If an entry may be used again, unpublish or archive it instead of deleting it.
What next?
If the standard weekly plan is ready and the organisation needs temporary variations, continue to Schedule periods.